
Quick connect fittings are designed to make connections fast, secure, and tool-free. But releasing them incorrectly can lead to leaks, damaged tubing, or even injury.
Whether you’re working on plumbing, pneumatic lines, or automotive systems, understanding the right way to disconnect these fittings is essential.
This comprehensive guide explains what quick connect fittings are, how they work, and exactly how to release them safely and effectively. It’s written for DIYers, technicians, and maintenance teams who want clear, practical instructions they can trust.
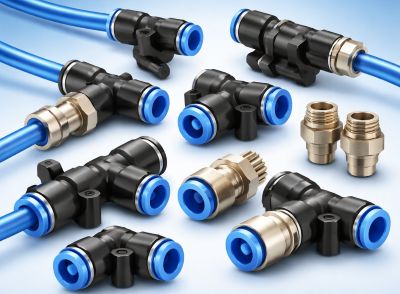
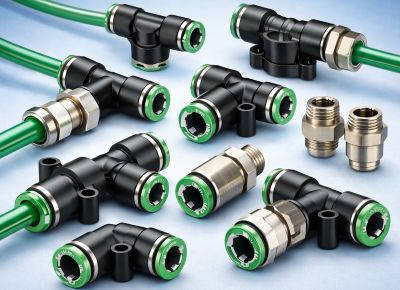
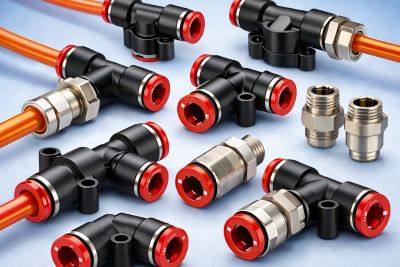
What Are Quick Connect Fittings?
Quick connect fittings (also called push-to-connect or quick-release fittings) are connectors that allow tubing or hoses to be installed and removed quickly without threading or complex tools. They rely on internal locking mechanisms and seals to create a tight, leak-resistant connection.
How Quick Connect Fittings Work
Most quick connect fittings use:
➡️ A gripping mechanism (such as a collet or locking teeth) that holds the tubing in place
➡️ An O-ring or seal that prevents leaks
➡️ A release mechanism (collar, sleeve, or button) that disengages the grip when pressed or pulled
When tubing is pushed in, the fitting locks automatically. When released correctly, the grip loosens and the tubing slides out smoothly.
Common Materials
Quick connect fittings are commonly made from:
1. Plastic – lightweight, corrosion-resistant, common in water filtration and appliances
2. Brass – durable and widely used in plumbing and pneumatic systems
3. Stainless steel – high strength and corrosion resistance for industrial or harsh environments
Typical Applications
Quick connect fittings are used across many industries, including:
1. Plumbing (water supply lines, filtration systems)
2. Pneumatic systems (compressed air lines)
3. Hydraulic systems (low-pressure hydraulic applications)
4. Automotive and appliances (fuel lines, refrigerators, HVAC units)
Types of Quick Connect Fittings
Understanding the type of fitting you’re working with is critical for proper release.
1. Push-to-Connect Fittings
The most common type. Tubing pushes straight in and locks automatically. Release is done by pressing a collar or collet.
2. Collet-Style Fittings
Feature a visible ring (collet) at the opening. Pressing the collet inward releases the tubing.
3. Sleeve or Collar-Release Fittings
Use a sliding sleeve or collar that must be pulled back or pushed forward to disengage the lock.
4. Ball-Lock Quick Couplers

Often used in pneumatic and hydraulic systems. Internal ball bearings lock the connection until a sleeve is pulled or rotated.
5. Manufacturer-Specific Designs
Some brands use proprietary mechanisms or require special release tools. Always check manufacturer instructions when available.
How to Identify the Type
Look for:
1. A visible collar, sleeve, or ring
2. Markings or brand names on the fitting
3. Whether the tubing releases by pushing, pulling, or sliding a component
Tools and Materials You May Need
While many quick connect fittings are tool-free, having the right tools helps:
➡️ Quick connect release tool (for tight or recessed fittings)
➡️ Open-end or adjustable wrench (for surrounding components)
➡️ Flathead screwdriver (for specific designs—use carefully)
➡️ Safety gloves and eye protection
➡️ Clean cloth or rag
➡️ Manufacturer instructions, if available
Safety Precautions Before Releasing Quick Connect Fittings
1. Depressurize the System
Always release pressure from air, water, hydraulic, or gas systems before disconnecting fittings.
2. Shut Off the Supply
Turn off fluid, air, or gas at the source to prevent sudden discharge.
3. Allow Hot Systems to Cool
Heat can cause burns or damage seals during removal.
4. Wear Proper PPE
Safety gloves and eye protection reduce the risk of injury from residual pressure or debris.
5. Why Safety Matters
Skipping safety steps can result in:
➡️ High-pressure fluid or air release
➡️ Injury to hands, eyes, or face
➡️ Damaged fittings or tubing
Step-by-Step: How to Release Quick Connect Fittings
General Release Method (Push-to-Connect)
Step 1: Turn off and depressurize the system
Confirm there is no pressure in the line.
Step 2: Push the tubing inward slightly
This relieves tension on the internal locking mechanism.
Step 3: Press or slide the release collar/collet
Use your fingers or a release tool to push it evenly toward the fitting body.
Step 4: Pull the tubing straight out
Avoid twisting or bending, which can damage the tubing or fitting.
Step 5: Inspect fitting and tubing for damage
Check for scratches, deformation, or worn seals.
Releasing Sleeve or Collar-Type Fittings
1. Identify the sliding sleeve or collar
2. Grip the fitting body firmly
3. Pull or push the sleeve as designed while removing the tubing
4. Avoid partial engagement of the sleeve, which can cause jamming
Common mistakes to avoid: pulling the tubing without fully moving the sleeve or using excessive force.
Releasing Ball-Lock or Coupler Fittings
1. Pull or rotate the outer sleeve to disengage the ball locks
2. Be prepared for residual pressure
3. Disconnect slowly and deliberately
How to Release Stuck or Jammed Quick Connect Fittings
Common Causes
➡️ Dirt or debris inside the fitting
➡️ Residual pressure
➡️ Corrosion or wear
➡️ Misaligned tubing
Safe Techniques
➡️ Use a proper release tool for even pressure
➡️ Clean around the collet or collar
➡️ Gently push tubing in before releasing
➡️ Avoid excessive force, which can crack fittings
When to Replace
If the fitting won’t release without force or shows visible damage, replacement is usually the safest option.
Common Mistakes When Releasing Quick Connect Fittings
Here are the common mistakes when releasing quick connect fittings:
1. Pulling tubing without pressing the release mechanism
2. Forgetting to depressurize the system
3. Twisting or bending tubing
4. Using pliers or sharp tools that damage components
5. Reusing damaged fittings
Inspecting and Reusing Quick Connect Fittings
What to Check
➡️ O-rings and seals for cracks or flattening
➡️ Tubing ends for scratches or deformation
When Reuse Is Safe
➡️ Seals are intact
➡️ Tubing is clean and cut squarely
➡️ Fitting releases and locks smoothly
Replace the Fitting If
➡️ It leaks after reconnection
➡️ The release mechanism sticks
➡️ Seals are visibly worn
Troubleshooting Quick Connect Fitting Issues
1. Fitting won’t release:
Check for pressure, dirt, or improper release technique.
2. Tubing won’t come out cleanly:
Inspect for damaged tubing ends or internal gripping teeth.
3. Leaks after reconnection:
Cut tubing square, reseat fully, or replace worn seals.
4. Fitting won’t lock after reinstallation:
The collet or internal grip may be damaged—replacement is recommended.
Tips for Easier Removal in the Future
1. Install fittings correctly the first time
2. Cut tubing squarely and cleanly
3. Keep fittings free from dirt and debris
4. Use manufacturer-approved tubing
5. Perform routine inspections and maintenance
Frequently Asked Questions (FAQ)
Do quick connect fittings require special tools?
Most do not, but release tools can help with tight or recessed fittings.
Can quick connect fittings be reused?
Yes, if they’re undamaged and seals are intact.
Why does my fitting leak after reconnection?
Common causes include damaged O-rings, scratched tubing, or improper seating.
Are quick connect fittings universal?
No. Sizes, materials, and designs vary by manufacturer and application.
How long do quick connect fittings last?
With proper installation and maintenance, they can last many years, but lifespan depends on pressure, temperature, and usage.
Conclusion
Releasing quick connect fittings correctly is about technique, safety, and inspection. By depressurizing the system, using the proper release method, and avoiding common mistakes, you can disconnect fittings safely without damage.
Whether you’re a DIYer or a professional technician, always follow manufacturer guidelines and replace fittings that show signs of wear. Taking the time to do it right protects your system, your tools, and most importantly, your safety.
Post time: Dec-29-2025